Count down: 8 finished - 12 more to go
Tuesday, July 20, 2010
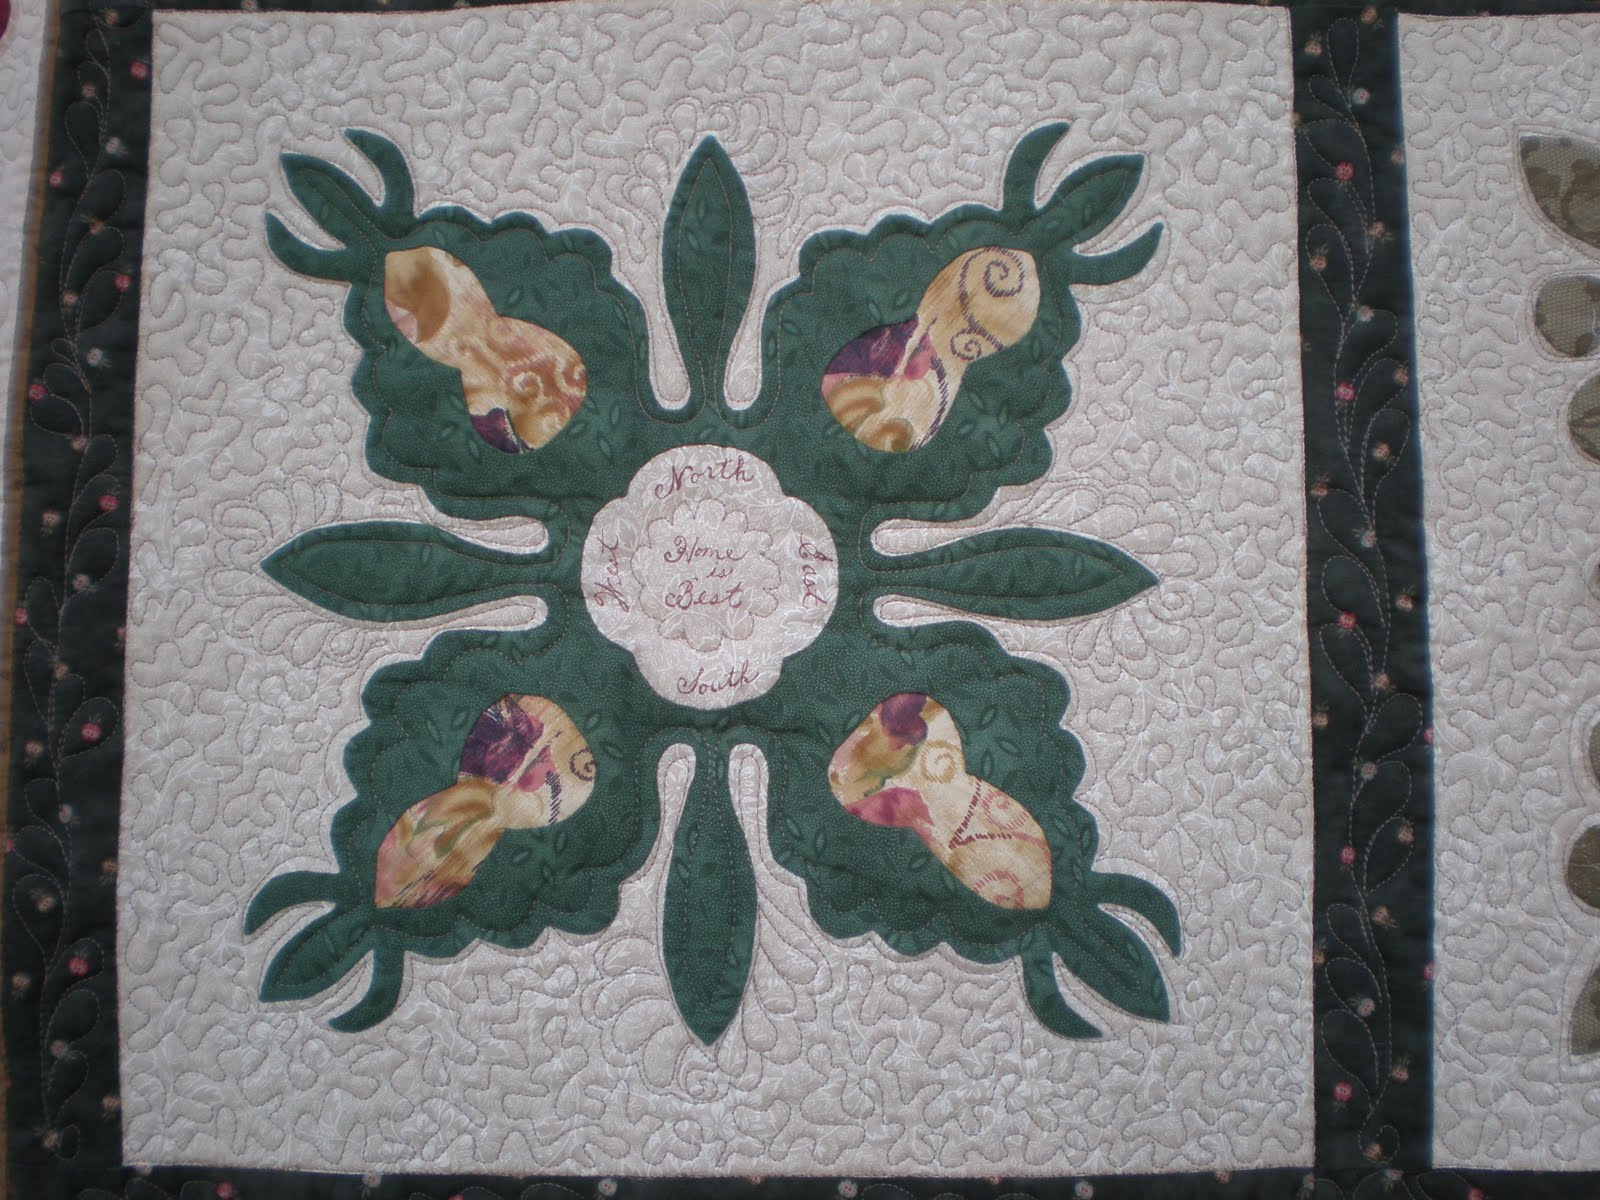
Block #8, Fruit (Civil War Bride Quilt)
Here is my next block. I really enjoyed making all the fruit. It seems like a happy block to me - maybe because of the yellow.
Monday, July 12, 2010
Block #4, Grapes (Civil War Bride Quilt)
Here's the next block I've been working on - the block with several bunches of grapes. I finshed this block last week but discovered my camera was broken. I was so disappointed, I really liked that camera. My husband lent me his so I was able to get a picture.
I made extra grapes so I'd have them ready for block #8. Guess I'll do that one, with all the fruit, next.
Count down: 7 finished - 13 more to go
Thursday, July 1, 2010
Block #14, Peahen (Civil War Bride Quilt)
My little peahen is finished and is busy strutting around under the wild rose bush. I sure am captivated by this charming quilt - can't seem to put it down. I hope I can keep the enthusiasm going because this is only the 6th block I've made. There are still 14 blocks to go. It feels a little daunting when I think of it that way and of all the little pieces that go into each block. But, one stitch at a time and it will eventually be a quilt. :-)
Count Down: 6 finished - 14 more to go
Berry Sour Cream Pie Recipe
I tried a new recipe over the weekend for a Berry Sour Cream Pie. I had planned to take it to a sewing get-together. I didn't feel well Saturday morning and had to miss the get-together. So you guessed it, my husband and I have had to eat up the pie all by ourselves. Pure bliss. Reminds me of a really delicate cheesecake with berries in the middle. Yum! Here's the recipe if you want to try it, I even was able to make a low-fat version and sure couldn't tell it was low anything.
Berry Sour Cream Pie
1 egg, beaten
1 container (16 oz) sour cream (I used lite sour cream)
3 TB flour
1 Keebler Ready Graham Pie Curst (I made a homemade crust using Smart Balance)
1 cup mixed berries (I used frozen mixed berries [strawberries, blueberries, raspberries, & blackberries])
1 recipe of berry sauce (recipe below)
(Canned blueberry pie filling could be substituted for the mixed berries and berry sauce. That's usually too sweet for me - I prefer to make my own sauce so I can control the amount of sugar and salt.)
To make Berry Sauce to mix in with the berries: 2 TB cornstarch, 2/3 cup water, 1/3 cup sugar, pinch of salt - combine sauce ingredients and bring to a boil, stirring until sugar is dissolved and sauce is thickened and glossy. Let cool slightly before mixing in berries. Then mix in the berries.
In medium bowl whisk together egg, sour cream, sugar, and flour. Place crust on a baking sheet. Spread half of sour cream mixture into the crust. Top with berry/sauce mixture. Spread remaining sour cream mixture over filling. Bake on baking sheet at 375 degrees for 55-60 minutes or until center is almost set and the pie gets golden around the edges. It will split a little when it's set, just like cheesecake does. Cool for 1 hour on a rack. Refrigerate at least 2 hours. Serve cold. Store in refrigerator. Good recipe to make ahead and serve the next day.
Berry Sour Cream Pie
1 egg, beaten
1 container (16 oz) sour cream (I used lite sour cream)
3 TB flour
1 Keebler Ready Graham Pie Curst (I made a homemade crust using Smart Balance)
1 cup mixed berries (I used frozen mixed berries [strawberries, blueberries, raspberries, & blackberries])
1 recipe of berry sauce (recipe below)
(Canned blueberry pie filling could be substituted for the mixed berries and berry sauce. That's usually too sweet for me - I prefer to make my own sauce so I can control the amount of sugar and salt.)
To make Berry Sauce to mix in with the berries: 2 TB cornstarch, 2/3 cup water, 1/3 cup sugar, pinch of salt - combine sauce ingredients and bring to a boil, stirring until sugar is dissolved and sauce is thickened and glossy. Let cool slightly before mixing in berries. Then mix in the berries.
In medium bowl whisk together egg, sour cream, sugar, and flour. Place crust on a baking sheet. Spread half of sour cream mixture into the crust. Top with berry/sauce mixture. Spread remaining sour cream mixture over filling. Bake on baking sheet at 375 degrees for 55-60 minutes or until center is almost set and the pie gets golden around the edges. It will split a little when it's set, just like cheesecake does. Cool for 1 hour on a rack. Refrigerate at least 2 hours. Serve cold. Store in refrigerator. Good recipe to make ahead and serve the next day.
Sunday, June 27, 2010
Block #7, Peacocks (Civil War Bride Quilt)
I really enjoyed making this block. I love to look at peacocks. The ones I made, using civil war fabrics, aren't quite as brightly hued as a real peacock but I'm pleased with how they turned out. I embroidered the feet as someone on the Civil War Blog suggested and was much happier doing them this way rather than appliqueing them out of fabric. I'm discovering that the finishing details in a block are what captivate my attention and excite me. This block was one that got me excited because there were lots of details to play around with............couldn't wait to see what the peacocks would look like when they were finished. I just love seeing how a block evolves itself (anyway it seems like it takes on a life of it's own and creates itself the way it wants to be sometimes, if you know what I mean. I don't really know how to explain it but I just love that part.) So here are my peacocks:
Count Down: 5 finished - 15 more to go
Wednesday, June 23, 2010
Block #6, Red, White, & Blue Flowers (Civil War Bride Quilt)
Another block is finished. I feel like I'm beginning to make some progress on this quilt - this is the fourth block I've made. Since there are 20 blocks, it will be quite an investment of time and effort. I found I enjoyed making this block a lot. I thought of my grandson, who is in the military, as I was making it what with the red, white, and blue flowers. If I counted right, there are 46 leaves in this block. It actually felt like it went faster than the last leafy block I made.........and the last one had a few less leaves. I think I may be getting into a groove here. :-)
Count Down: 4 finished - 16 more to go
Thursday, June 17, 2010
Block #2, White Flowers (Civil War Bride Quilt)
When I originally saw the CWB pattern my first impression was that there were an awful lot of leaves. I thought that if I ever made it, I'd cut back on the number of leaves I put in each block. Then I decided to make the quilt and wouldn't you know it, I put every last leaf on this very leafy block. I guess the charm of the quilt got to me and I just couldn't help myself. So here is my block #2 with leaves galore.
Count Down: 3 finished - 17 more to go
Friday, June 11, 2010
Red, White, & Green Lasagna Recipe
This week I made what is now our new favorite lasagna and thought I'd share the recipe just in case you're craving lasagna. This recipe is pretty easy for a dish that usually takes quite a bit of time to prep.
Red, White, & Green Lasagna
12 lasagna noodles (cooked according to package directions - 10 minutes)
1 (15 oz) container ricotta cheese (or half ricotta and half cottage cheese)
1 (10 oz) package frozen chopped spinach, partially thawed so clumps can be broken up
2 cups (8 oz) shredded mozzarella cheese
½ cup shredded Parmesan cheese, divided
2 eggs
1 lb bulk Italian sausage or ground beef, cooked & drained
1 onion, chopped (cooked in with the sausage)
1 (26 oz, approx) jar marinara pasta sauce (we like Prego with mushrooms in this)
1 (16 oz, approx) jar alfredo pasta sauce
chopped fresh parsley or dried parsley
¼ tsp Italian seasoning
Preheat oven to 350 degrees. In large bowl, combine ricotta cheese, spinach, half the mozzarella cheese, 2 TB of the Parmesan cheese, and the eggs. Mix well. Spray a 15 x 9” baking dish, spread 1 cup marinara sauce, layer 4 lasagna noodles over sauce. Top with half the cheese mixture, 1 cup marinara sauce, and all the cooked sausage. Layer 4 more lasagna noodles, remaining cheese mixture, and remaining marinara sauce. Top with 4 remaining lasagna noodles. Spread Alfredo sauce evenly on top. Sprinkle with remaining mozzarella and Parmesan cheese. Sprinkle with the Italian seasoning. Cover with foil. Bake for 40 minutes. Uncover. Bake an additional 15 minutes or until hot and bubbly. Let stand 10 minutes before cutting. Serves 10-12.
If this recipe looks familiar, it's a take off on the recipe I found on the back of American Beauty Lasagna Noodles. I made some minor adjustments and we just loved it. It would also be good without the turkey Italian sausage and even the eggs as a vegetarian dish.
Red, White, & Green Lasagna
12 lasagna noodles (cooked according to package directions - 10 minutes)
1 (15 oz) container ricotta cheese (or half ricotta and half cottage cheese)
1 (10 oz) package frozen chopped spinach, partially thawed so clumps can be broken up
2 cups (8 oz) shredded mozzarella cheese
½ cup shredded Parmesan cheese, divided
2 eggs
1 lb bulk Italian sausage or ground beef, cooked & drained
1 onion, chopped (cooked in with the sausage)
1 (26 oz, approx) jar marinara pasta sauce (we like Prego with mushrooms in this)
1 (16 oz, approx) jar alfredo pasta sauce
chopped fresh parsley or dried parsley
¼ tsp Italian seasoning
Preheat oven to 350 degrees. In large bowl, combine ricotta cheese, spinach, half the mozzarella cheese, 2 TB of the Parmesan cheese, and the eggs. Mix well. Spray a 15 x 9” baking dish, spread 1 cup marinara sauce, layer 4 lasagna noodles over sauce. Top with half the cheese mixture, 1 cup marinara sauce, and all the cooked sausage. Layer 4 more lasagna noodles, remaining cheese mixture, and remaining marinara sauce. Top with 4 remaining lasagna noodles. Spread Alfredo sauce evenly on top. Sprinkle with remaining mozzarella and Parmesan cheese. Sprinkle with the Italian seasoning. Cover with foil. Bake for 40 minutes. Uncover. Bake an additional 15 minutes or until hot and bubbly. Let stand 10 minutes before cutting. Serves 10-12.
If this recipe looks familiar, it's a take off on the recipe I found on the back of American Beauty Lasagna Noodles. I made some minor adjustments and we just loved it. It would also be good without the turkey Italian sausage and even the eggs as a vegetarian dish.
Monday, June 7, 2010
"Drawing" Faces Tutorial
I'll try as best I can to expain how to put a face on your applique lady (in this case the Civil War Bride Quilt - Bride Block). If you can't freehand draw, like me, do a search at: Google, Images, and type in free coloring pages faces or something similar. Then find a line drawing of a face that appeals to you (such as on freecoloringpages4you.worldpress.com). Under most of the images during your search you'll see the phrase "find similar images". That can also bring up some good results.
Print out the face you have chosen. If it's not the size that you need, you may have to reduce or enlarge it.
Then take skin colored fabric (I used the reverse side of some peach colored fabric I had in my stash - beige fabric would also have been a good candidate for the way I wanted my Bride to look) and iron freezer paper to the reverse side.
Put your chosen face on a lightbox. Put your fabric with the freezer paper on the back on top and secure both pieces down to your lightbox with painters tape or similar so they won't slip around.
Now draw the face lightly with a mechanical pencil. Check your work, and if you're not happy with it, do a little bit of light erasing, and try again. If you're happy with it, go over the pencil lines with a brown or black Micron pen (use one that has a fairly fine point such as an 01).
Now take some colored pencils (the inexpensive Crayola brand are fine or whatever you have) and give her color to her lips, cheeks, and hair. A good rule of thumb is to use 3 different colors on her hair including a yellow to show as hightlights so it won't look flat.
Her eye needs 3 colors, the white part of the eye you'll just leave your plain fabric, then you'll have a colored part, and a black center. To make her come to life she needs a little sparkle to her eyes. To do that, take a toothpick and dip the end into some white acrylic paint. Put just a dot on the black part of her eye.
I then took a peachy colored or ochre colored pencil and add some shading to her face. It would be all around the outside of the face, under the chin, etc. If you're at a loss, look in the mirror and see where the shadows show up on your face and put the same ones on your drawing.
When you're happy with the results, cut out your drawing, leaving your turn-under allowance all around the outside edge. Applique her down and you're finished.
This is a technique I learned in a class from ArleneS at the Quilted Apple in Phoenix, AZ.
Print out the face you have chosen. If it's not the size that you need, you may have to reduce or enlarge it.
Then take skin colored fabric (I used the reverse side of some peach colored fabric I had in my stash - beige fabric would also have been a good candidate for the way I wanted my Bride to look) and iron freezer paper to the reverse side.
Put your chosen face on a lightbox. Put your fabric with the freezer paper on the back on top and secure both pieces down to your lightbox with painters tape or similar so they won't slip around.
Now draw the face lightly with a mechanical pencil. Check your work, and if you're not happy with it, do a little bit of light erasing, and try again. If you're happy with it, go over the pencil lines with a brown or black Micron pen (use one that has a fairly fine point such as an 01).
Now take some colored pencils (the inexpensive Crayola brand are fine or whatever you have) and give her color to her lips, cheeks, and hair. A good rule of thumb is to use 3 different colors on her hair including a yellow to show as hightlights so it won't look flat.
Her eye needs 3 colors, the white part of the eye you'll just leave your plain fabric, then you'll have a colored part, and a black center. To make her come to life she needs a little sparkle to her eyes. To do that, take a toothpick and dip the end into some white acrylic paint. Put just a dot on the black part of her eye.
I then took a peachy colored or ochre colored pencil and add some shading to her face. It would be all around the outside of the face, under the chin, etc. If you're at a loss, look in the mirror and see where the shadows show up on your face and put the same ones on your drawing.
When you're happy with the results, cut out your drawing, leaving your turn-under allowance all around the outside edge. Applique her down and you're finished.
This is a technique I learned in a class from ArleneS at the Quilted Apple in Phoenix, AZ.
Friday, June 4, 2010
Block #3, The Bride Block (Civil War Bride Quilt)
The other block I worked on for this month is the Bride. I decided to put her in a wedding dress and give her a bridal bouquet instead of a second apple as shown in the pattern. Her head is done using permanent micron pens and then is shaded with colored pencils.
Here's a close-up of the Bride. You can double click on the picture if you want to see more detail.
Block #9, The Bird of Paradise Block (Civil War Bride Quilt)
I've logged a lot of hours working on two of the blocks for "The Civil War Bride Quilt". The first block I made is Block #9, the Bird of Paradise Block. The main fabric line I'm using is a Moda fabric called Rouenneries designed by one of their newest designers, French General. This fabric is in shades of Turkey Red, grays, and oysters. It was inspired by French textiles of the 18th century so fits in with the era of the Civil War. I'm also using some Thimbleberries fabric and some reproduction fabric from my stash, and am using muslin for my background in a tea dyed color. I've been longing to use the beautiful Rouenneries fabric that I got last year for a special quilt for my front room. I wanted something with gray and red in it for in there. This should work out great.
Here's a picture of the Bird of Paradise that I made. He's kind of handsome, isn't he?
Friday, May 28, 2010
Civil War Bride Quilt
Now that the Baltimore Album class I took at the Quilted Apple is finished we've started on a new series of classes to begin making the "Civil War Bride Quilt" (also sometimes called the "Bird of Paradise Quilt"). It looks like we'll be aiming to get two blocks finished per month. It's a 20 block quilt so at that pace plus one class for the border it will take us nearly a year. When the instructor, ArleneS, told us about the next project, I didn't realize it was the same quilt that the ladies on the Baltimore site I follow (BaltimoreQuilts@YahooGroups.com) have been so excited about. I was doing an internet search for some pictures and history when it dawned on me that it was one and the same quilt. I already thought it was a beautiful quilt but this made me even more excited.
Since there were so many of the ladies in the Yahoo Baltimore group that were planning to make this quilt, one of them decided to start a separate blog (thecivilwarbridequilt.blogspot.com) so that those interested in making the quilt using the pattern from Threadbear out of Australia (Threadbear.com) can all encourage each other. Can you feel my excitement ramp up another notch..........I think it would be so much fun to do a quilt along with both a blog group, and a class, and be able to share ideas.
To make a long story short, I received my pattern from Threadbear last month and finally pulled fabric this week. Yesterday I made some design changes (I want a groom for my bride plus a house and.............) and also prepped the blocks. In class Arlene decided we'd try block #9 (Bird of Paradise block) and block #3 (Bride block) first. I'll likely be making them in the order the class is making them. Today I started on block #9 and also sent an email to the blog coordinator to see about joining in the discussion on the blog.
Here's a picture of the Civil War Bride Quilt that was developed by Corliss of Threadbear that I'll be working on:
Floral Belle's Quilt
This week I finally got busy on my Floral Belle's Quilt. I've been taking a class at the Quilted Apple from ArleneS. Her patterns are all so wonderful it makes me wish I could make them all. I pulled fabric and started on the first block. There are only 4 blocks in this quilt but they're huge - 19 x 22". It's going to be an adorable quilt but, like I said, I want to do them all and end up having so many projects going at once, that it takes half of forever to finish one. Here is my progress so far on block one - she'll be holding a cute little teddy bear when she's finished.
Simple Sticheries from the Heart Quilt
I've started working on the blocks for a darling embroidery quilt called "Simple Sticheries from the Heart". This is turning out to be a great handwork project to take when I go to my sewing groups. There's not much to carry, and it doesn't take too much concentration, so I can talk while I work on it - yeah! I finished block number two last week for the quilt. Then I decided I wanted to try hoopless handquilting and thought I'd make another of these cute blocks for a wallhanging as a practice piece for my handquilting lark. I was totally surprised to find out I'm now "in love" with handquilting. I guess I won't know for sure though until I try it on a larger quilt. It does take a huge chunk of time to do it and my underneath finger is still pretty chewed up. Sure would love a handquilted Baltimore quilt though.
Here are pictures of the handquilted wallhanging and also the first two blocks I finished.
Thursday, May 20, 2010
Baked Egg Cups
I decided to make my husband a special breakfast this morning so I made him Baked Egg Cups. He's been moving his commercial insurance business office to our home. What a time of it he's had. Both his computer and his business email wouldn't work. It's taken him days and days and several hundred dollars to the geeks to finally get everything up and running. So, needless to say, he's been stressed, I thought he ought to have a special breakfast as a celebration, now that everything's finally working. Here's a picture and the recipe I used for the Baked Egg Cups.
Baked Egg Cups
6 slices bread (any type-I used whole wheat)
Butter (I used Smart Balance)
6 TB ham, diced
6 eggs
6 TB cheese (I used grated mild cheddar)
Butter both sides of bread. Remove crusts. Cut a small slit in each corner. Spray muffin tins with Pam and arrange bread in 6 of the cups. Bake in a 375 degree oven for 10 minutes to crisp the bread. Remove. Place 1Tb of diced ham on the bread in the bottom of each cup, top with an egg, sprinkle 1 TB of cheese on top of each filled cup. Bake for an additional 15 minutes.
Rick said the special breakfast made his day.
Since my muffin tin is a 12 cupper - I mixed up a box of Jiffy cornbread mix and filled the other 6 cups for tonight's dinner. Wouldn't want those extra 6 muffin cups to just sit there unfilled, would I?
Friday, May 14, 2010
Am I Really a Baltimore?
Here it is.................my completed Baltimore Album Quilt. I call it "Am I Really A Baltimore?" I'm so happy to have it all quilted, bound, and ready to hang. I was intimidated to begin a project of this magnitude but am so pleased that I stuck with it and got it finished. I didn't keep track of how long it took me to make all of the blocks, the border, and to assemble the top, but I did keep track of how long it took to quilt it - 92 hours. Whew! Truly though, I really did enjoy making this quilt. I spent many contented hours doing the needle-turn applique and the dimensional flowers on the blocks. The inkwork was scary but once I got started on it, it was kind of fun too. It was so rewarding to see the personality developing in each block. There is so much special meaning in this quilt for me and for my family.
Here's a close-up of the center block:
And here are pictures of the individual blocks:
Here's a close-up of the border:
Monday, May 3, 2010
My Baltimore Album Quilt Top is Finished
After hours and hours and hours of appliqueing, my Baltimore Album top is finally finished. It was a very windy day last week when I tried to snap pictures, so I wasn't able to get a very good shot, but.................here it is.
I've started quilting it and it's much more labor-intensive to do custom quilting on a quilt this size than I had imagined. I'll post more pictures later - need to get back to quilting.
Thursday, April 29, 2010
Some yummy casserole recipes and cheesecake too
I've had a busy couple of weeks trying to get my Baltimore Album Quilt completed (hopefully only one more week to go) so decided to prepare a few casseroles to graze on so that I wouldn't have to stop and cook. Thought I'd share the recipes because they're some of our favorites.
Here are the recipes for the dishes I made: Popover Chicken, Spaghetti Pie, Boned Chicken Casserole, and one dessert too - Cheesecake.
Popover Chicken
Boneless pieces of 1 cooked chicken (I use rotisserie chicken)
1 can cream of celery soup
1/2 can milk or fat free half & half
Vegetables of choice such as, sauted onion, celery, carrot, peas (pot pie type vegetables - maybe even sliced water chestnuts for crunch)
Popover batter
3 eggs, well beaten
1 TB oil
1 ½ cup flour
1 ½ cup milk
1 tsp salt
Put meat, soup, milk, & vegetables in the bottom of a sprayed 9 x 13” pan. Mix eggs, oil, milk, flour, & salt until smooth. Pour over chicken mixture (it makes a popover topping). Bake at 350 degrees for 1 hour.
Spaghetti Pie
2 cups cooked spaghetti
2 eggs (egg substitute can be used)
¼ cup Parmesan cheese (I use Kraft shredded Parm)
½ cup mushrooms (fresh or canned)
Optional – other fresh vegetables can be added, such as broccoli, asparagus, peppers, onions, etc.
Italian sausage
1 cup cottage cheese (low fat can be used)
1 cup spaghetti sauce
½ cup grated, part-skim mozzarella cheese
Mix spaghetti, eggs, and Parmesan cheese. Spread in the bottom and up sides of large greased pie or quiche pan. Layer the following on top of this crust: vegetables, Italian sausage, then cottage cheese, spaghetti sauce, and cheese. Bake at 350 degrees, uncovered, for about ½ hour or until cheese is golden and pie is bubbling. Faster than lasagna and really good.

Boned Chicken Casserole
2 flat cans boned chicken or turkey (I often substitute rotisserie chicken instead)
1/3 cup melted margarine (I use Smart Balance)
1 cup uncooked rice cooked according to package directions or 1 cup cooked pasta such as elbows
1 (4 oz) can mushrooms
4 oz baby peas (optional)
1 can cream of chicken soup
1 can evaporated skim milk or 1 cup fat free half and half
2 TB slivered almonds
Mix melted margarine, chicken, soup, milk, vegetables, and rice or pasta and mix well. Pour into sprayed 9” baking dish. Sprinkle slivered almonds on top and place ina 325 degree oven for 30-45 minutes until browned on top. Serves 6.
My version is low fat but could also use regular evaporated milk or half and half.
Very rich tasting and quick to prepare.
I have to share a story about the Boned Chicken Casserole recipe and the Almond Cheesecake below. Many years ago a friend of mine and her husband lived with me for awhile when he went to culinary school. I would come home from work in the evening to the great smells of some of the dishes he had prepared. He was such a good cook! And it was such a treat to have someone else cook for me. These are two of his recipes that I saved and have used over the years because we liked them so much.
Almond Cheesecake-crustless
2 8 oz pkgs. low fat cream cheese
½ tsp almond extract
3 eggs or egg substitute to equal 3 eggs
2/3 cups sugar
Topping
1 cup low fat sour cream
3 TB sugar
½ tsp vanilla
½ tsp almond extract
Beat first four ingredients until thick. Put in a 9” sprayed pie plate and bake for 25-35 minutes at 350 degrees until firm. Cool 10 minutes. Meanwhile beat topping ingredients together. Pour over the top of the cheesecake and bake another 10 minutes. Can sprinkle sliced almonds on top if desired. I prefer it as is, but some of my family like it with a dollop of blueberry, cherry, or strawberry pie filling. Great no matter how you serve it.
Here are the recipes for the dishes I made: Popover Chicken, Spaghetti Pie, Boned Chicken Casserole, and one dessert too - Cheesecake.
Popover Chicken
Boneless pieces of 1 cooked chicken (I use rotisserie chicken)
1 can cream of celery soup
1/2 can milk or fat free half & half
Vegetables of choice such as, sauted onion, celery, carrot, peas (pot pie type vegetables - maybe even sliced water chestnuts for crunch)
Popover batter
3 eggs, well beaten
1 TB oil
1 ½ cup flour
1 ½ cup milk
1 tsp salt
Put meat, soup, milk, & vegetables in the bottom of a sprayed 9 x 13” pan. Mix eggs, oil, milk, flour, & salt until smooth. Pour over chicken mixture (it makes a popover topping). Bake at 350 degrees for 1 hour.
Spaghetti Pie
2 cups cooked spaghetti
2 eggs (egg substitute can be used)
¼ cup Parmesan cheese (I use Kraft shredded Parm)
½ cup mushrooms (fresh or canned)
Optional – other fresh vegetables can be added, such as broccoli, asparagus, peppers, onions, etc.
Italian sausage
1 cup cottage cheese (low fat can be used)
1 cup spaghetti sauce
½ cup grated, part-skim mozzarella cheese
Mix spaghetti, eggs, and Parmesan cheese. Spread in the bottom and up sides of large greased pie or quiche pan. Layer the following on top of this crust: vegetables, Italian sausage, then cottage cheese, spaghetti sauce, and cheese. Bake at 350 degrees, uncovered, for about ½ hour or until cheese is golden and pie is bubbling. Faster than lasagna and really good.
Boned Chicken Casserole
2 flat cans boned chicken or turkey (I often substitute rotisserie chicken instead)
1/3 cup melted margarine (I use Smart Balance)
1 cup uncooked rice cooked according to package directions or 1 cup cooked pasta such as elbows
1 (4 oz) can mushrooms
4 oz baby peas (optional)
1 can cream of chicken soup
1 can evaporated skim milk or 1 cup fat free half and half
2 TB slivered almonds
Mix melted margarine, chicken, soup, milk, vegetables, and rice or pasta and mix well. Pour into sprayed 9” baking dish. Sprinkle slivered almonds on top and place ina 325 degree oven for 30-45 minutes until browned on top. Serves 6.
My version is low fat but could also use regular evaporated milk or half and half.
Very rich tasting and quick to prepare.
I have to share a story about the Boned Chicken Casserole recipe and the Almond Cheesecake below. Many years ago a friend of mine and her husband lived with me for awhile when he went to culinary school. I would come home from work in the evening to the great smells of some of the dishes he had prepared. He was such a good cook! And it was such a treat to have someone else cook for me. These are two of his recipes that I saved and have used over the years because we liked them so much.
Almond Cheesecake-crustless
2 8 oz pkgs. low fat cream cheese
½ tsp almond extract
3 eggs or egg substitute to equal 3 eggs
2/3 cups sugar
Topping
1 cup low fat sour cream
3 TB sugar
½ tsp vanilla
½ tsp almond extract
Beat first four ingredients until thick. Put in a 9” sprayed pie plate and bake for 25-35 minutes at 350 degrees until firm. Cool 10 minutes. Meanwhile beat topping ingredients together. Pour over the top of the cheesecake and bake another 10 minutes. Can sprinkle sliced almonds on top if desired. I prefer it as is, but some of my family like it with a dollop of blueberry, cherry, or strawberry pie filling. Great no matter how you serve it.
Wednesday, April 14, 2010
Umbrella Quilt
My friend Kim and I have decided to make a quilt together for one of the ladies in our guild (Foothills Quilters - we call it Foothills) to win. Foothills is currently doing a Block of the Month together and there is a lotto type drawing done each month where one lady wins all of that month's blocks. Kim and I thought it would be fun, if at the end of the year, all the ladies who had made blocks but hadn't won any, got a second chance to win. We decided to make this month's block - an umbrella block - into a quilt for a lucky second chance winner. The drawing for the quilt will be at our Christmas Party in December. I decided to make a sample quilt as a sort of mock-up of the quilt we're working on since I love this little block so much and wanted to have a quilt for myself too. Here's mine.....I think it's pretty close to what the second chance quilt will look like.
Ugly Fat Quarter Quilt Tops
At the mini-quilting retreat we had last week in Payson, AZ, each lady who attended was asked to bring 2 ugly fat quarters. A challenge was given to the winner to make a quilt from them. Guess who won the ugly fat quarters!? Since there were enough fat quarters, I was able to make two quilt tops. Here's what I put together using these "lovelies". I used the Turning Twenty Again pattern for both of these quilt tops.
This one is made up of the purple, lavendar, pink, and misc. colored fat quarters - I used a lavendar butterfly border. Kind of reminds me of uglies emerging into butterflies. This one will either go to a granddaughter, if one of them dibs it, or will go to charity.
I used the more antique looking fabrics in the following quilt top and added the border fabric in with the blocks. I may keep this one........it actually looks kind of nice. The fabric that won as the ugliest was used in this top.........I didn't think it was so ugly........it's the mustard colored fabric with the bear paw prints on it (click to enlarge if you can't find it).
Subscribe to:
Posts (Atom)