Friday, December 25, 2015

Merry Christmas!


Hope you get to spend many happy hours with loved ones & friends & have a blessed Christmas!


We spend a wonderful day with our 2 year old grandson, Zahn, on Christmas Eve.  It was so great to see the excitement on his face when he opened his gifts.  One of his favorites was a Batman tricycle.  His feet don't quite touch the peddles yet but he seemed to get around on it just fine anyway.  In this picture he is testing some of the buttons.

 
A small collage of pictures of Zahn in 2015.

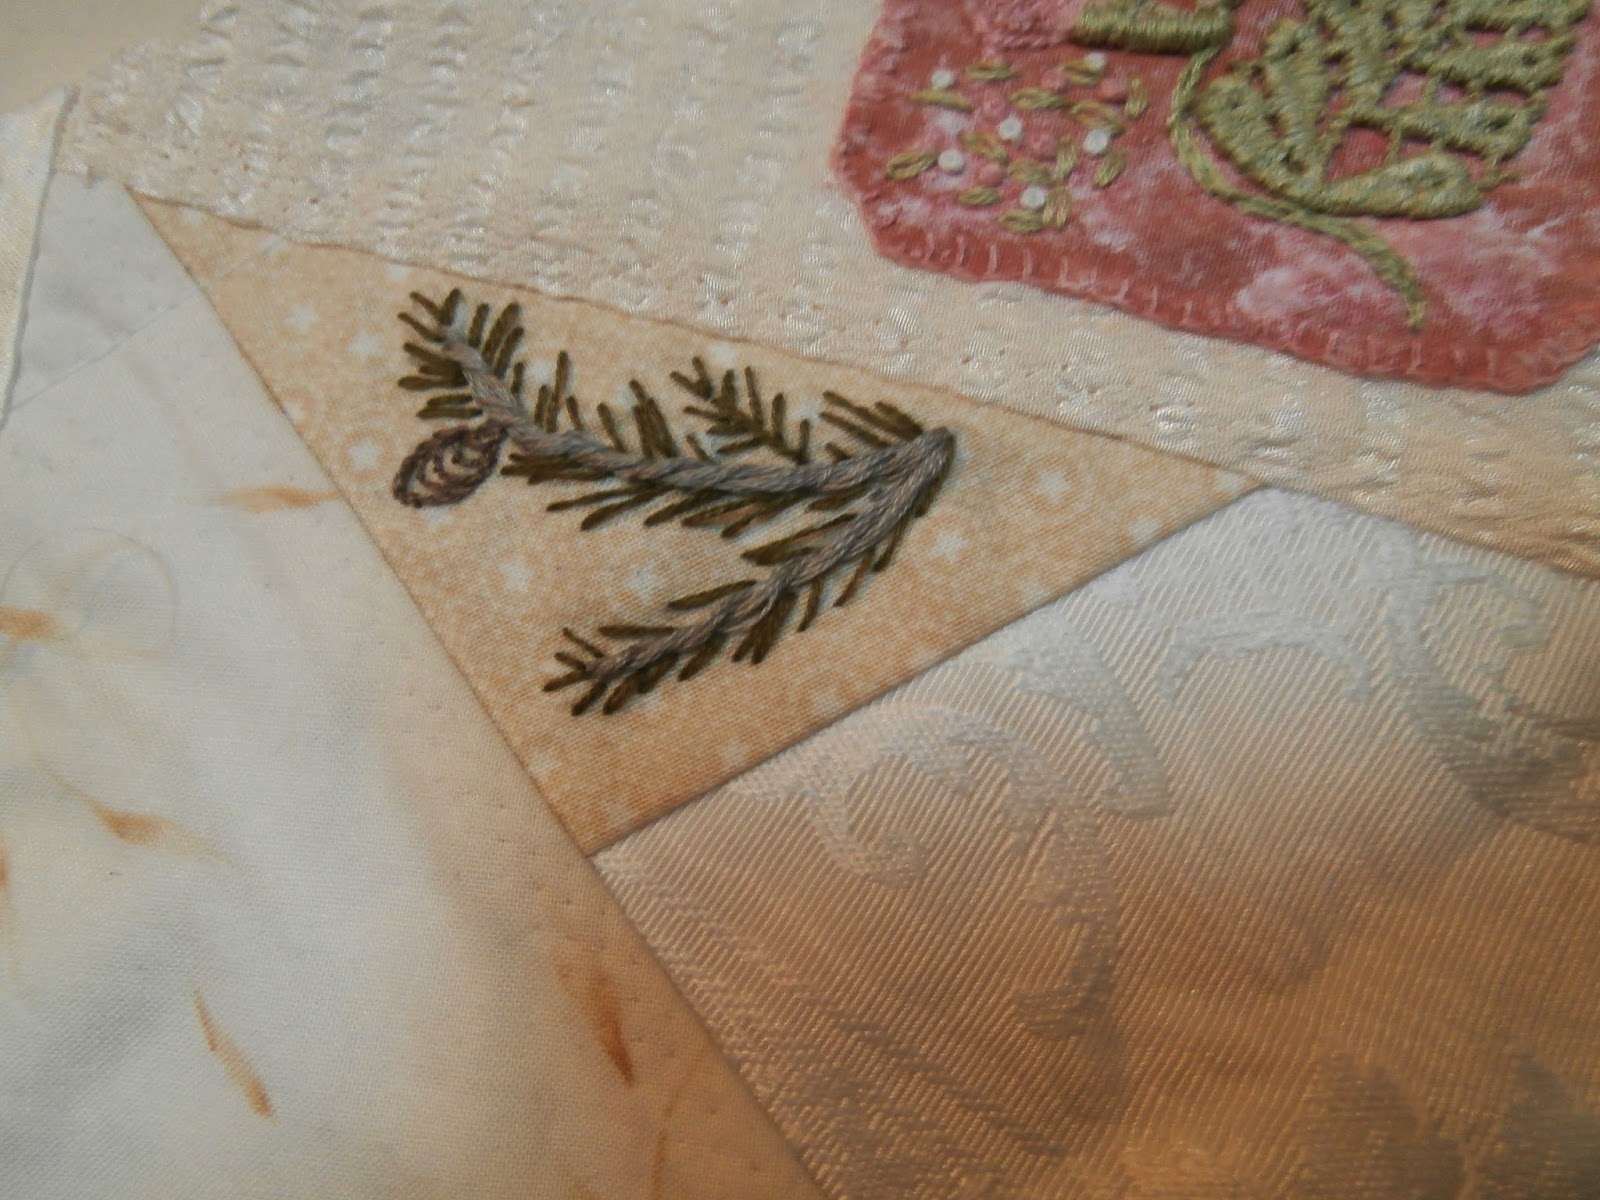
I also want to share the Block of the Month quilt that I'm leading in my Palo Verde Patchers Handwork Group this year.  It's called, "Twelve Days of Christmas".  It's a redwork quilt with crazy quilt blocks. 
Here are the blocks:

Here's the finished quilt:
 

  I also spent a little time teaching the ladies how to make a crazy quilt block and demonstrated  embroidery stitches each month so they could stitch on the seams of their crazy quilt blocks.

Handmade Christmas Gifts for 2015

Seasons' Greetings.  I spent many happy hours making Christmas gifts for my quilting friends this year.  For some I made a crazy quilt style embroidery hoop picture and for some I made a little pin cushion using wool felt with fabric accents.  

 
What a wonderful time of year!  I feel so blessed to be able to spend time with friends and family.  Last week alone I attended 3 Christmas luncheons - good food, good friends, and a lot of good memories made. 

Thursday, November 26, 2015

Happy Thanksgiving

Image result for thanksgiving clipart
Thanksgiving Blessings to all my family & friends!

Wednesday, October 21, 2015

Quilting Ladies that I Quilted for a Friend

I occasionally do custom quilting for others, not as a business, but just for fun.  Here is a quilt of cute quilting ladies I did for a friend from my Palo Verde Patchers' quilting group. 


I did a meander around the quilting ladies.

There's a feathered wreath in the large 4-patch blocks.

This is the inner border design.

A feathered outer border.
 
I was very slow finishing this quilt.  This poor lady had to wait for quite some time for her quilt.  I'm finally starting to feel better though, I've had quite a bad fibro flare, and it's kept me out of my sewing room for several months.  I don't do quilt show quality quilts - I just quilt for fun from time to time.  I'm pleased to have this one finished. 

Monday, October 5, 2015

Crazy Quilt Mini Silk Ribbon Embroidery Flowers

Finished the Crazy Quilt Class (#107 Mini Silk Ribbon Embroidery Flowers) in August but forgot to post pictures.  Fun class, learned a lot, and have already made a few more flowers for some of my other crazy quilt blocks.

Scene #1.  Can you see the little bunny in the bottom right corner?

Scene #2
 
Both scenes together.
 
I was able to get them both in my hoop, side by side, because I made them half the size of the pattern.  My plan is to put them into the center of a crazy quilt block so I wanted to make them small enough to do that.  It made forming the flowers, and fitting them into the allotted space along the fences a little bit more challenging, but that's okay. 

Saturday, June 13, 2015

Monograms for my Crazy Quilt Blocks

This is my embroidered monogram for the Intermediate Crazy Quilt class I'm taking from Kathy Shaw.  I started it in an earlier class and finished it with leaves and French knots during this class.


My beaded monogram was quite a challenge for me.  I wasn't happy with the color of the beads I used.  The blue was too bright and just didn't look right with the other colors on the block.  I used up some brain cells trying to decide what to do.  Then I remembered that I had some Tsuineko ink from an earlier class.  I tried the silver ink, and liked the results, but the ink partially wore off while I was embroidering the remainder of the word.  This morning I got some silver nail polish to put over the top, and viola, it worked. 


These are my ribbon monograms.  I decided to make 2 of these, and feel okay about the first one, and really like the second one.


Reworked Spiderweb

I was busy working on monograms and got stalled on the beaded one for class.  Just didn't like the color of beads I used.  So while my brain was spinning gears for a solution I decided to work a little bit more on one of my spider webs.  It's a pattern from one of the class hand-outs and I love the pattern.  However, once I got it on my block, it seemed too small.  I decided to rework it and make it into an expanded motif/combination motif.

Here is the reworked spider web and the original one I made.  I like how the reworked one fits the space better and it seems more interesting to me.  I put a momma bird, and nest with 2 baby birds in it, to round out the story.  Better, right?


Saturday, June 6, 2015

Motifs, Expanded Motifs, and Wisteria for My Crazy Blocks

This was a fun task to do - so many wonderful ideas on the internet to be inspired by, and our instructor, Kathy Shaw, includes a lot in her handouts too. 

For my Basic Motif, I decided to make some flip flops for my block with the palm trees on it, and some suitcases, just because I thought the picture I saw of them on the internet was so adorable.  I used some Madeira gold metallic thread on the suitcases and was pleased that it wasn't the type that shreds.  I'll use this brand again.


For my Expanded Motif, I made an old fashioned roadster.  Then added a scene of a picnic.  I can just picture myself relaxing under that tree and enjoying a nice spring afternoon.


For my Expanded Motif, I also wanted to make this cute little boy.  He reminds me of my grandson who is about this age.  I decided to flip the picture to better fit my block and change the candle to a bouquet of flowers made with floss and silk ribbon.  I can just picture him picking flowers from the garden and presenting them to me with a shy little grin.


For my Mixed Technique, I used one of the pretty designs in our handouts.  I decided to try making some woven roses out of perle cotton.  I also used silk ribbon and made a gathered rose for the center, some fly stitch roses, and some detached chain stitch rose buds.


For my Wisteria, I used Jute for the twisted trunk, silk ribbon and floss for the flowers, and silk ribbon and perle cotton for the leaves.
 

Making Spider Webs for my Crazy Blocks

The next task in the Intermediate Crazy Quilt Class I'm taking is spider webs.  We're to make them on a vine or branch and include a spider.  I'm not real fond of spiders so the ones I make need to be small and innocent looking.  No big, scary spiders for me.  No sir.

 
This web is on a broidery perse vine for my little spider.


Sunday, May 24, 2015

Making Trees for My Crazy Blocks

Last week we went to Denver for our granddaughter's graduations.  It rained the entire time we were there so we didn't get to do many outdoor activities - I was glad I'd taken my crazy quilt blocks along because I had a lot of time to work on them.  I love trees so most of my blocks will likely have a tree on them.  I was able to make quite a few with so much down time.  Here's what I've made so far.

These are my Twisted Trees.  I hadn't tried this process before & loved it.

Twisted Tree Weeping Willow
  
Twisted Floss Pine Bough
 
These are my embroidered trees.  I really had fun with these.
 
 Oriental Tree in Bloom Using Back Stitch, Lazy Daisy Flowers, & French Knot Buds
 
Tree Using French Knots & Back Stitch.
I hope to try this technique again with the French Knots less dense.
 
Because my blocks were already made before I added the trees, I used a small hoop.  The hoop seems to have stretched the satin fabric.  I tried blotting with water and it worked on the cotton fabric but not on the satin.  I don't think ironing is going to help either.  Oh well - it is what it is. 
 
Tree Using Lazy Daisy & Back Stitch

Straight Stitch Palm Trees
 
Pine Tree Using Lazy Daisy, Algerian Eye Stitch, & Back Stitch
 
Tree Using Chain Stitch & Feather Stitch

Wednesday, May 6, 2015

I'm Having Fun with Rit Dye

I decided to finish off what was left in my little jars of Rit dye from the Intermediate Crazy Quilting Class I'm taking (this one is about dyeing).  I used lots of laces and trims.  Here is a collage of them wet and then one of them dry.

 Wet
 
Dry
 
There was still quite a lot of Rit dye left in the little jars, and since I had a bolt of white muslin, I decided to cut some fat quarters, and give fabric a try.  I was able to use up the rest of the dye in the little jars and now all that's left is some of the 3 basic solutions.  The first picture is of the 14 fat quarters wet and the second picture is of them dry.  I've decided that I went from fabric that was probably about two dollars a yard for plain white muslin, to fabric that's probably close to nine dollars a yard or more, because it's now considered hand-dyed fabric.  And isn't it pretty?  It looks like a rainbow.  This is so cool!


Sunday, May 3, 2015

A Few More Crazy Quilting Completions

I think I'm in over-drive on crazy quilting.  I can't seem to put it down. 
 
This is one of the blocks I designed in ICQC 101 Design & Construction of Crazy Quilt Blocks.  I'm very happy to say....it's finished!  I'm  pleased with how it turned out, and all of the new techniques I learned, and tried on it.


Here are some pictures of how I used the tasks we did using acrylic paint.  I turned the painted background into a button garden and the painted frame into a frame for some flowers (I sponged it with some white acrylic paint so that the color wasn't so intense before I used it).  They both now live on my crazy blocks.


Some Finishes from My Intermediate Crazy Qulting Class

I'm learning so much in the Intermediate Crazy Quilting Class I'm taking with Kathy Shaw.  Here's the latest that we've been working on:

Here's 102E-Part 3-Watercolor Pencils (or Colored Pencils) to Alter an Image on Fabric.  I found this sweet little flower girl picture and decided she needed a home on one of my crazy blocks.  I used colored pencils that are set with Ceramcoat Textile Medium, some of the silk ribbon dyed with Rit from Task 102A, and some embroidery floss.


Here's the flower girl on the heart block I designed in ICQC-101.


 I had a lot of fun with 102E-Part 2-Markers on Silk Ribbon.  I used the Promarkers on the first two collages below.  Love using the Promarkers!
 
 
This view shows the 3 sets of silk flowers on the fan crazy block I designed in ICQC-101.
 
 
 I used three different types of fabric markers on the butterflies.  I thought they all did a good job.
 
I decided to use the fabric markers on some lace also - not real happy with the results on lace.
 
 
These are fabric pastels using the stencil method.  I appliqued some of the leaves I made onto a spray of lavender on one of my crazy blocks.   I set the leaves with a hot iron and some Ceramcoat Textile Medium to make sure they were permanent.


In 102E-Part 1- Painting Charms, I decided to see how both charms and buttons would look painted.  I used both Tsukineko Inks and Nail polish in gold (with a clear coat of polish over the gold polish).  I like how both turned out - they both even worked on plastic buttons. 
 
 
These are the things I dyed in ICQC 102-C - Acid Dyeing.  I used Rit dye to dye lace, silk ribbon, and embroidery floss.
  
 
The next 3 pictures are the things I painted in ICQC 102-A - Painting with Acrylic Paint.